Copyright © My Little Corner of the World
Design by Dzignine
Monday, December 18, 2017

Catching Up

I can hardly believe it's been a month since I have posted. I knew I had been busy, but I was sure it had only been two weeks.... Ooops....

November/December tend to be pretty busy for just about everyone. Once Thanksgiving came, it was like the starter pistol for the season. We've been pretty booked since then. I have managed to still make time for crafting, but was busy enough to keep forgetting to take pictures for the blog.

So let's catch up... Thanksgiving we ate, watched movies, and SHOPPED! I know that Black Friday brings up mixed feelings for people. The hubby and I use these heavily discounted days to knock out most of our Christmas shopping for family members as well as several gifts for Toys for Tots. We usually go in with a great plan to get in and out quickly and it works every year. This year was the same except there was a trio of ladies that put our planning to shame. These adorable ladies went in wearing tall bright Christmas antlers to easily spot each other and capped it off with a set of walkie talkies. I need to step up my shopping game!

 I don't know that I have really mentioned it on this blog, but I know all my Facebook friends and Pinterest followers know my love of Sam and Dean Winchester. We had an opportunity to get tickets to see the boys live, but it felt like almost as soon as Thanksgiving was over, the hubby and I were on our way to San Francisco for Creation's Supernatural Convention.

I need to start by saying that I have done quite a few different conventions, but by far the fans at this convention were the nicest. Everyone was sweet and inclusive. There was a lot to see and do at the convention, but let's be honest we were there for the boys! You know, these ones.... Jared Padalecki and Jensen Ackles

(Creation's Supernatural Convention December 2017)

They were just as funny and charming in person and on stage as they are on the show. You can tell they truly love their fans! 

Another reason we went to this particular convention is that the hubby and I are both The Walking Dead fans. Those of you who watch both Supernatural and The Walking Dead know that Jeffery Dean Morgan who played John Winchester in Supernatural now plays Negan on the The Walking Dead. That's right  Mr. JDM was in attendance (insert fangirl squeal here)! 

(Creation's Supernatural Convention December 2017)


In the blink of an eye the convention was over and we were back to reality. The hubby and I then went and enjoyed the annual Christmas concert at our church which featured:

James Durbin - American Idol Finalist & Lead Singer for Quiet Riot
Jonah Kim - Grammy Award Winning Cellist
Rebecca Jackson - Violinist for the San Francisco Ballet & Founder and Artistic Director of Music In May  

The concert was amazing and heartfelt.

And then it was on to an early screening of Star Wars: The Last Jedi. Absolutely stunning, amazing, incredible, and all the other adjectives that describe how fantastic this movie was. I know some fans are split, but I enjoyed every minute of it. 

We had some other stuff going on, but you get the general idea of it. So here we are, a few days before Christmas and I am now just getting to post the pictures of my remaining Christmas Card Creations, here we go:


Stamps Used: Avery Elle Winter Woodland Wonders
Inks Used: Archival Black, VersaMark, Distress Ink (milled lavender, dusty concord, and seedless preserves), Zig clean color real brush markers
Paper Used: Strathmore Bristol Smooth
Accessories: White Embossing Powder


Stamps Used: Neat and Tangled Santa's Wonderland
Inks Used: Archival Black, VersaMark, Distress Oxide Ink (Faded Blue Jeans), Zig clean color real brush markers
Paper Used: Strathmore Bristol Smooth
Accessories: White Embossing Powder, Stickles


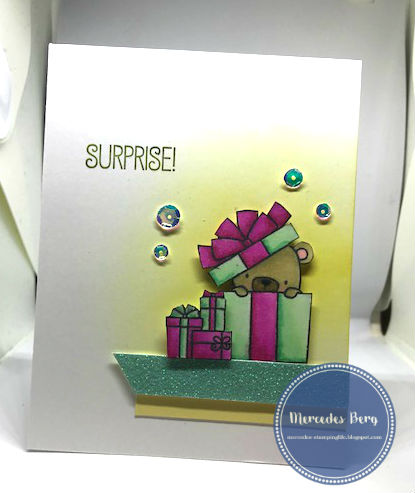
Stamps Used: Paper Smooches A Blessed Christmas
Inks Used: Archival Black, Distress Oxide Ink (fossilized amber), Zig clean color real brush markers
Paper Used: Canson Watercolor
Accessories: None


Last, but not least
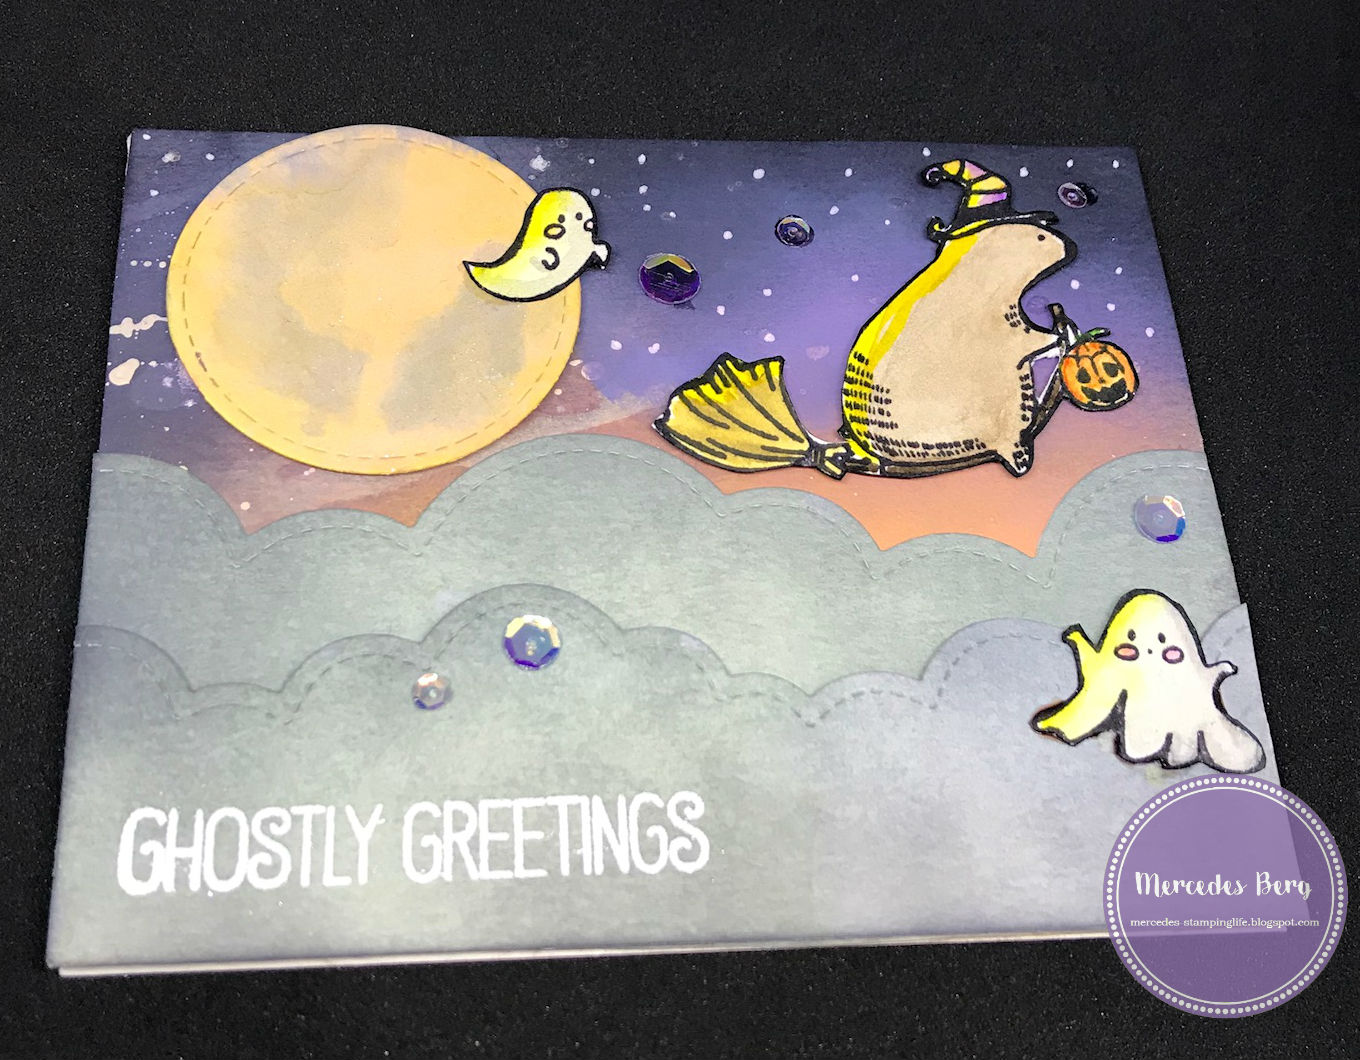
Stamps Used: My Favorite Things Birdie Brown Beast Friends and My Favorite Things Birdie Brown Santa's Elves
Inks Used: Archival Black, Distress Ink (weathered wood, chipped sapphire, black soot ), Zig clean color real brush markers
Paper Used: Strathmore Bristol Smooth, Stampin Up! Chocolate Chip
Accessories: Neat and Tangled sequins

Sorry for the hurried post, but I wanted to get something in before Christmas. I hope that whatever holiday you celebrate, that you are all happy, warm, and safe!! 


Until next time, keep on crafting!

Thursday, November 16, 2017

Let the Christmas Cards Begin

Hola! Welcome back. If you read my last post, you will know that I was prepping for "stamp camp" for my my wonderful Mother in Law, my fantastic Aunt in Law and their friends. I have to say it was a blast, and while I got pictures of the cards I made I did not take any pictures of us ladies together. Tons of fun was had. We stamped, we laughed, we ate lunch, and of course had chocolate, so it was the perfect crafty day!

Onto the cards....


My first card was pretty easy. I pulled out my Cricut to cut out the layers that make up Bethlehem onto watercolor paper. I watercolored Bethlehem with my Kuretake Gansai Tambi watercolors. I then used Distress Inks in Chipped Sapphire and Black Soot on the background and embossed the Star and Oh Holy Night sentiment from Paper Smooches A Blessed Christmas set. I finished the whole thing off with some gold sequins from Pretty Pink Posh.


I used Neat and Tangled's Little Baby Jesus Stamp and Die set to create a super cute but simple card. I stamped my image onto Neenah Solar White and pulled out my Stampin' Up! Markers to color Baby Jesus in. I die cut it out and used foam tape to pop him up. 


I used Neat and Tangled's Beary Merry to create a candy bar holder (instructions can be found  on Splitcoaststampers). I used some red cardstock for the base and used a piece of Lawn Fawn's Knit Picky patterned paper for the slip cover. I stamped that Beary Merry onto watercolor paper and  watercolored him in. 


That's it for this post. Until next time, keep on crafting!


Friday, November 10, 2017

Quick Candy Holders

I have spent most of this week prepping a "stamp camp" for my wonderful Mother in Law, my fantastic Aunt in Law and their friends. I am helping them with Christmas cards, which I will be sharing once this weekend is over. In the mean time I have two super quick candy holders I made for friends to share with you!


My first project is a little box made from a sheet of my Fancy Pants Designs,  Etcetera Collection - 6 x 6 Paper Pad. I stamped out the little pig from MFT's Whole Herd stamp set onto some Strathmore Bristol Smooth and colored it in using my Spectrum Noir pens and my white gel pen. I fussy cut the little oinker and used my ATG gun to glue him to the front of my box. I filled the box with Hershey's kisses, closed it up then stamped the sentiment on a scrap piece of Strathmore Bristol Smooth and outlined it in a color that matched my paper. I finished it off with some hemp twine and some old Stampin' Up! lacey ribbon I had hanging around.

I found the instructions for the box at Pootles Blog HERE


My second candy holder is an old school "Sour Cream Container". I know it's called that because they used to do smaller sour cream portions in little pouches that had the same shape. As for me I remember the shape from Minute Made Juice Bars.. You know these ones: 


Anyway, these are super easy to make and can be dressed up in just about any theme! You can find directions on how to make them HERE.

I used some cute Hibiscus patterned paper I had hanging around and cut it to 5.5 x 4.25 inches. I filled the container with salt water taffy and then got to work on embellishments. I stamped out my favorite chameleon and that cute Hibiscus flower from BB Polynesian Paradise - MFT Stamps onto Strathmore Bristol Smooth paper and colored with my Spectrum Noir markers. I then took some Stampin' Up! twill ribbon and made a bow to add at the top. Honestly it took more time to color the chameleon than to put the whole thing together! 


Until next time Keep on Crating

Tuesday, October 31, 2017

MFT Color Challenge #80

So I have been away, doing stuff, per usual. I have been crafting, just not posting. I thought I would post my entry into MFT's Color Challenge #80. This challenge inspired not just my entry but a Christmas card for a dear family friend. So here we go!


Last week there was a night where I could not sleep. You know where the harder you try to sleep the more frustrated you become? Yeah, like that. Anyway, since I couldn't sleep I was checking out MFT's Card Challenge site and noticed the color combo for this challenge. Very cute colors, but a little out of my norm. I was banging my dead trying to think what I wanted to do with them. My first flash of inspiration came not for what MFT card I would make, but the for a Christmas card for a family friend. I recently purchased Darcie's Stamps Happy Holla Days because I knew our family friend would LOVE Hipster Santa! I mean look, isn't he too cute for words?


So I got to work and made this card here. Please excuse my tilted pictures, I could not find my tripod and decided to free hand it. Yup that did not work. By the end of picture time I was frustrated and said to heck with it. 

I used one of my old There She Goes stamps sets for the background. I can't remember the name of it, but it's this one below: 

Anyway I used this set as the background and put dear Hipster Santa in the foreground. It's kind of hard to tell but I stamped the card base with MFT's Whimsical Woodgrain Background and layered some So Safron from my stash. I swear it looks cuter in person!

On to my submission for the MFT Color Challenge....

Again, I had camera/tripod issues so the colors are not coming out a vibrant as they are on the card. Just looking at the picture irks me.. I swear I when I get my tripod back I will update with a new photo!!


Alright, I know it wasn't much of an update or post, but I've been busy, busy, busy. 

Keep on Craftin'!


Thursday, October 12, 2017

Whale, hello there...

Good morning! Did you all craft your hearts out this weekend for World Card Making Day? If you did, I am jealous. I 100% spaced it. I made other plans that day not remembering what it was. I was curious as to why my Facebook feed was filled with extra cards made by lovely people in groups I follow. Then it hit me.... BAM! How can I not be crafting on World Card Making Day? Don't get me wrong I got to spend time with my family, but I am still kicking myself.

I did eventually get around to making a couple of cards to share.

I love this card because it was super quick and easy. The only bummer is that I did not use my MISTI or Tim Holtz Platform and ended up with a little uneven coverage. She's still a beauty!

Stamps: Whale Wishes Mini Stamp Set
Inks: Memento Paris Dusk, Memento Rhubarb Stalk
Paper: Kraft Cardstock, Neenah Crest Solar White (80#), Patterned paper of unknown origin (makes it sound mystical, no?)
Accessories: Red Grosgrain Ribbon,  Whale Wishes die


 My second card I made took a bit longer than I anticipated. The first one I made did not turn out the way I wanted it to. I felt like something was missing. This is when I decided to stamp several images in Distress Oxide Ink (Worn Lipstick) and put a piece of vellum over that. That pulled it together for me.

Stamps: Lawn Fawn Baked With Love
Inks: Archival Black, Distress Oxide Ink (Worn Lipstick), Zig Clean Color Real Brush Pens
Paper: Kraft Cardstock, We R Memory Keepers Clearly Bold Acetate, Vellum, Bristol Smooth
Accessories: Die-namics Stitched Square STAX, Lawn Fawn Baked With Love dies


I would love to see what you all worked on for World Card Making Day. If you are willing to share, leave a link in the comment section!

Until next time, Keep on Craftin'!


Friday, October 6, 2017

Spook-tacular Cards and Podcasts

I know you are probably tired of hearing about it by now, but it was yet again another frantic week. Now before you roll your eyes and say Mercedes, isn't that always your excuse? And while it often is, this week it is for a fantastic reason; I recorded my very first podcast! I have to tell you I was terrified when I sat down to record with Billiam of SomewhatNerdy.com, Big D, and A.J., but after a few minutes with the group I was totally at ease. The podcast is going to be the Greatest Of All Time List, or the GOAT List. This podcast is going to be a bi-weekly podcast where myself and my fellow pod casters sit and talk about why a particular movie is the Greatest Of All Time... Except the movie isn't the greatest, not even close. We'll discuss all the cheesy goodness in our favorite B List Movies and then talk about why we love it and why it made our list. The first episode won't be up for a week or so, but when it is I will post a link for those of you who are interested in listening.


Now on to what you really came here for... The cards! I'm back again, with another Halloween card combo. This week I decided to use the same stamp sets and basic design idea to make two different cards.

Stamp Sets Used: BOO - by Waffle Flower Crafts, Fab-BOO-lous Friends by My Favorite Things
Paper: Canson Watercolor Paper, Stampin' Up! Basic Grey, Lawn Fawn Polka in the Dark
Ink: Archival Black, Kuretake Gansai Tambi Watercolors, Oxide Distress Inks (Black Soot, Faded Jeans, Wilted Violet, Spiced Marmalade, Fossilized Amber, and Iced Spruce), VersaMark, Spectrum Noir Glitter Marker, and Sakura White Gelly Roll
Accessories: Lawn Fawn Scalloped Box card pop-up dies, Lawn Fawn Puffy Cloud border die, Die-namics Stitched Sentiment Strips, Die-namics Stitched Circle Stax, Detail White Embossing Powder, and Neat & Tangled Like Magic Sequins


These two cards all started with the idea that I wanted to use my Distress Oxide Inks to creat a spooky twilight (time of night, not the movie) background and see if it would work in different sizes.

I started by blending my inks lightest to darkest on my watercolor paper (sizes: 4 1/4" x 5 1/2" and 3 1/4" x 2 1/4"). My smaller piece was run through my Cuttlebug with one of the panel dies from my Lawn Fawn Scalloped Box card pop-up dies and the larger piece was left as is. I now had two almost identical backgrounds in two different sizes. I then stamped, watercolored, and fussy cut out my images from the Boo Stamp Set. I set everything aside and ran the Lawn Fawn Scalloped Box card pop-up dies through my Cuttlebug with Stampin' Up! Basic Grey cardstock; then I got to work assembling my pop up box card.

Once I put my box card together I embellished with some Neat & Tangles Like Magic sequins, embossed the sentiment from Fab-BOO-lous Friends by My Favorite Things and voilà. I love the way the box card came out and am popping it in the mail this week to a really great friend.

As a side note, I bought a new light box to test out since I wasn't happy with my pictures. These are a little better, but I am still figuring it out so please be patient with me! 


If you remember from like a paragraph ago that I wanted to use the same background, just in two different sizes, so my second panel was attached to a card base and I built up from there. They layout is almost identical except the position of the ghosts. I embossed my greeting using a sentiment from Fab-BOO-lous Friends by My Favorite Things. 


I don't normally do "Halloween" cards, but I have just loved the sets that have been coming out so I have had to change my stance. What about you all? Do you make Halloween cards or do you use your Halloween stamps for something else? Let me know!

Overall I have to say that my little experiment worked out and I love, love, love how these cards make me feel like Halloween is here. 

That's all I have for now. If you're at all interested in know when the podcast gets published leave a comment!

Until next time Keep on Craftin'


Wednesday, September 27, 2017

Never too soon for Halloween


It seems like every year goodies for certain holidays start showing up sooner and sooner. I know that this can make many people roll their eyes, but not me. I love the first signs of Halloween goods popping up in stores, because that means fall is upon us. This for me starts the most magical time of the year. We start with Halloween, all the adorable costumes, and all the spooky movies. So it should not come as any surprise that my cards for this week are Halloween themed.

I picked up MFT Stamps Witch Way Is The Candy by Birdie Brown a couple of years back and did nothing with it until this year. Honestly, I used to have a job where I was on call 24/7 so as much as I love crafting, I never have time for it. These days though I have a set schedule and much more time to do what I LOVE!

This week I made two Shaker Cards using Witch Way Is The Candy.

My first shaker was easy enough to make. I used Stampin' Up!'s Summer Sun Cardstock for the frame and base of the card because I thought it went really well with the patterned paper from my stash. I die cut some clouds out of white cardstock using Lawn Fawn's Puffy Clouds Border Die and inked it up with some black soot Distress Ink. I threw in some Doodlebug Sequins and BAM, shaker was done.

I didn't run into any issues until I went to color that precious witch. My hubby recently surprised me with a full core set of the Spectrum Noir alcohol markers. While they are similar to Copics, they don't blend quite the same as Copics do. There's definitely a learning curve to them, but they are great markers and a truly sweet gift from a fantastic hubby!


My second card using that cutie put up a little more of a fight.I knew I wanted to put a shaker tag onto a card front and started working on the tag first. My first tag ended in Utter Disaster. I am not saying this to be dramatic, my first tag warped, my sequins fell out due to the warping, it was not pretty. The only thing I managed to salvage from that first tag was the sequins.

Creating my second tag went much smoother than the first. The sentiment is embossed onto black card stock and comes from the HSH Halloween Additions set by  There She Goes. I used some patterned paper from my stash for the background of the tag and sponged some Spiced Marmalade Distress Oxide Ink onto some white paper and die cut it out for the top of my tag. I finished the tag off with some Lawn Fawn Gold Sparkle Cord, black ribbon, and some gold Pretty Pink Posh sequins.

My tag ended up just a little bigger than I originally intended so I made a 5x7 card base out of Canson watercolor paper. I used my Kuretake Gansai Tambi to watercolor the base with black and gold and put it all together.


My question to y'all is, are excited to see Halloween stuff already or do you wish they would wait until closer to the actual holiday?

Until next time, keep on craftin'!

Tuesday, September 19, 2017

Card Design Contest

I'm back y'all. I have been working on Halloween and Fall cards for the blog, but decided to put that on hold to enter My Favorite Things Stamps 2017 Card Design contest. I have to say after viewing all the entries I am definitely intimidated by the talent pool. That being said, I had such a blast working on these cards. I'm hoping y'all like them too.

So first up is my entry for the Clean & Simple Genius

For this card I used MFT's Polynesian Paradise by Birdie Brown

My card base is made out of Canson Watercolor Paper. I started by stamping that adorable chameleon, then masking off the area where my sentiment was going to go with Post-It note tape. I next stamped the flowers from the same set and pulled the Post-It note tape off and used my Zig Clean Color Real Brush Markers to color both the flowers and the chameleon. Next I used natural hemp twine to line the top and bottom of the sentiment area and finished it all off with sequins in two shades of green. I know it's hard to tell as my lighting was off..


My next entry is for the Coloring Virtuoso

I do not by any means consider myself a "Coloring Virtuoso", but challenges and contests like these help me to push myself and continue to work on my coloring abilities!

For this card I used three of MFT's stamp sets: The Whole Herd, Ewe are the Best, and Beary Special Birthday all by Birdie Brown.

 I did A LOT of masking for this card. I started by using my Die-namics Circle STAX Set 1 to die cut a circle out of a piece of 4 1/4 x 5 1/2 masking paper. I saved the interior circle mask for later use and lined up the exterior portion of the mask with my Canson Watercolor card base. I first stamped the party hat from the Beary Special Birthday set and masked it. I next stamped that cute cow from The Whole Herd set and masked it off. I used the Beary Special Birthday set again to stamp the balloons onto the cow's tail. I then used the grassy hill from the Ewe are the Best set to complete my stamped scene. I left everything masked and used MFT's Stencil Cloud with my Distress Oxide Ink in Broken China. The clouds were darker than I wanted, but overall I like the way it came out. At this point I pulled all the masks off my project and started coloring with my Zig Clean Color Real Brush Markers. I finished the card off by using stickles on the balloons, my white gel pen on the cow's cheeks and hat, and embossing my sentiment onto black card stock. BOOM!


And last but not least is my entry for the Innovation Master

Can I start by saying I underestimated how complex other people's card would be. I toyed with not entering this card at all, but at the end of the day you just have to go for it.

For this entry I used MFT's Magical Unicorns set by Birdie Brown

I stamped several of the smaller images using my Memento Drops in London Fog all over two 4 1/4 x 5 1/2 pieces of white cardstock. I left one as is then colored the second piece using Copic markers.
I took the uncolored panel and die cut a stitched square out of it using my Slider Channel Companion Windows. I also die cut out the Channel Slider and stamped it to match my background. I then stamped the galloping unicorn using the same Memento ink in London Fog and colored it in with my Copics and added some shine to the mane with my Spectrum Noir glitter marker. I die cut the unicorn out and used foam tape to adhere it's leg onto the slider panel I had set up on the card front. Next I took my colored panel and covered it in VersaMark ink and used some old Stampin' Up! iridescent ice embossing powder. I mounted this panel behind my card front. I finished it all off by embossing my sentiment onto pink cardstock and cutting the ends at different angles and adding some Doodlebug twine.


I hope you enjoy these cards as much as I enjoyed making them. Keep on crafting!!


Thursday, September 7, 2017

Cards make the best gifts

My favorite Aunt in the whole world hates when people spend money on her. She would rather people save their money and just spend time with her. She is the sweetest lady you could ever know. She also happens to love my cards, so every year I make a stack of cards to give to her for her birthday. She absolutely loves this because she gets to give handmade cards to friends and family throughout the year. I thought I would share my last batch I did.


I wanted to make a little bit of everything for her. Since I try and make multiples of a card when I sit to do my crafting, I was also able to throw in some of my duplicates.

Let's start with the newer cards:

I love to buy patterned paper. It is always so adorable, but half the time I am not sure what to do with it. I am working on using more of my stash, so you will see quite a bit of patterned paper used here!

This first card happened by accident. I love this pattern paper, which I have no idea where I got it from. I found that Stampin' Up!'s Pink Passion, Basic Gray, and Summer Sun worked well the pattern.


(Papertrey Ink: Butterfly Die)


(Lawn Fawn: So Jelly Stamp and Die Set)


(Papertrey Ink: Out to Sea Stamp Set)

(Lawn Fawn: Baked With Love Stamp and Die Set)


(The Greeting Farm: Roll Call Wild Sprouts Stamp Set)


(Stampin' Up!: Well Scripted Stamp Set)

(Stampin' Up!: Well Scripted Stamp Set)

(Papertrey Ink: Fillable Frames #8 Mini Stamp Set and Die)


All the cards above were boxed up with envelopes in the box below. The bow was made with my We R Memory Keepers Envelope Punch Board.


Thanks for stopping by and don't forget to keep crafting!!